< Blog Boosting your Color
One of the most important things my father ever told me was that YOU CAN DO ANYTHING YOU WANT TO! I never doubted him and he never doubted me. I’ve always had the same idea and have shared with my friends….
If I can – You can too!
With that said, here is my new website and Blog. I will be calling my blog – U CAN 2!
My plan is to , keep it short and keep it graphic so you don’t have to read very much. If this sounds good to you, watch my blog for updates monthly. I may have video tutorials inserted and if they are long, I will also have the video under my Tutorial page so you won’t have to search backwards through weekly blogs if you want to see it again.
I’m open to suggestions too, send me your thoughts and I hope I get to know you better as time goes by.
I will share my projects I’m working on. Above you will see my Ostrich which I started several years ago (2011) in Susan Carlson‘s class at Empty Spools Seminars. She is an inspiration and a wonderful teacher, I’m not sure why, but when I got home, I tucked it away, but I opened that box a few days ago and said – It’s time to finish… so that’s what I’m working on this week.
TODAY’S UCAN2 is a bit of inspiration and a bit of technology: MAKING A PHOTO BRIGHTER
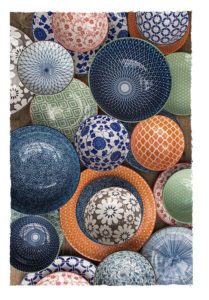
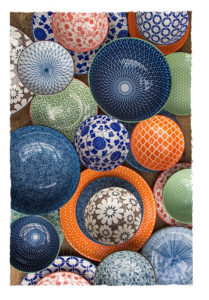
I saw this photo of plates in a catalog and was drawn to it, it made me think of a Spider Web quilt, using this photo as my inspiration, I started planning and imagining what the new quilt would look like.
So here is a quick tutorial for you: I found this photo appeared too dull/lifeless for me. I knew I could change that by using Photoshop (any version).
Originally I took this photo with my iPhone, then sent it to my computer using “AirDrop“ an Apple Product* Once there, I went to Photoshop and did the following:


FILE
OPEN (search for the folder with your photo, select/OPEN)
Select the tab IMAGE, pull it down
Select ADJUSTMENTS an arrow will show more options
Select HUE/SATURATION you will find 3 slider bars there, feel free to experiment because you can always CANCEL out.
I use the middle bar SATURATION and slide it to the right to intensify the colors to what I want.
When I like the results, I SAVE AS with a updated file name. Example: I named the original photo “Roger’s Dinner Party” when I “upped” the saturation, I SAVED AS “Rogers Dinner Party B”
This way I have two files, the original I can always go back to and my new “brighter” photo.
*Ask me about AirDrop if you need to know
